A Step-by-Step Guide to Deploying Open AI Models on Microsoft Azure
Azure OpenAI (AOAI) is part of the Azure AI Services suite, providing REST API access to OpenAI’s advanced language models, including GPT-4o, GPT-4 Turbo with Vision, GPT-4, GPT-3.5-Turbo, and the Embeddings model series.
What’s the difference between Azure OpenAI and OpenAI models?
The models are identical. The key difference is that with Azure OpenAI, you benefit from Microsoft’s cloud security features, including private networking, regional availability, and responsible AI content filtering.
What do you need to create an Azure OpenAI resource?
You’ll need an Azure subscription (you can start with the $200 credit offered when you create an Azure account). Get Azure in here.
Tutorial
1- Start with an Azure Subscription:
Once your Azure subscription is enabled, go to portal.azure.com and sign in with your credentials.
2 — Locate Azure OpenAI:
Use the search bar at the top of the page to search for “Azure OpenAI” and select the first result.

3 — Once selected, Azure will redirect you to Azure AI Services | Azure OpenAI. In case you already have AOAI resources created, they will be displayed in here. To create one select from the menu the option +Create or press the button “Create Azure OpenAI”.

4 — Create an Azure OpenAI Resource:
Azure will direct you to the Azure AI Services | Azure OpenAI page. If you already have AOAI resources, they will appear here. To create a new one, click on “+Create” or the “Create Azure OpenAI” button.
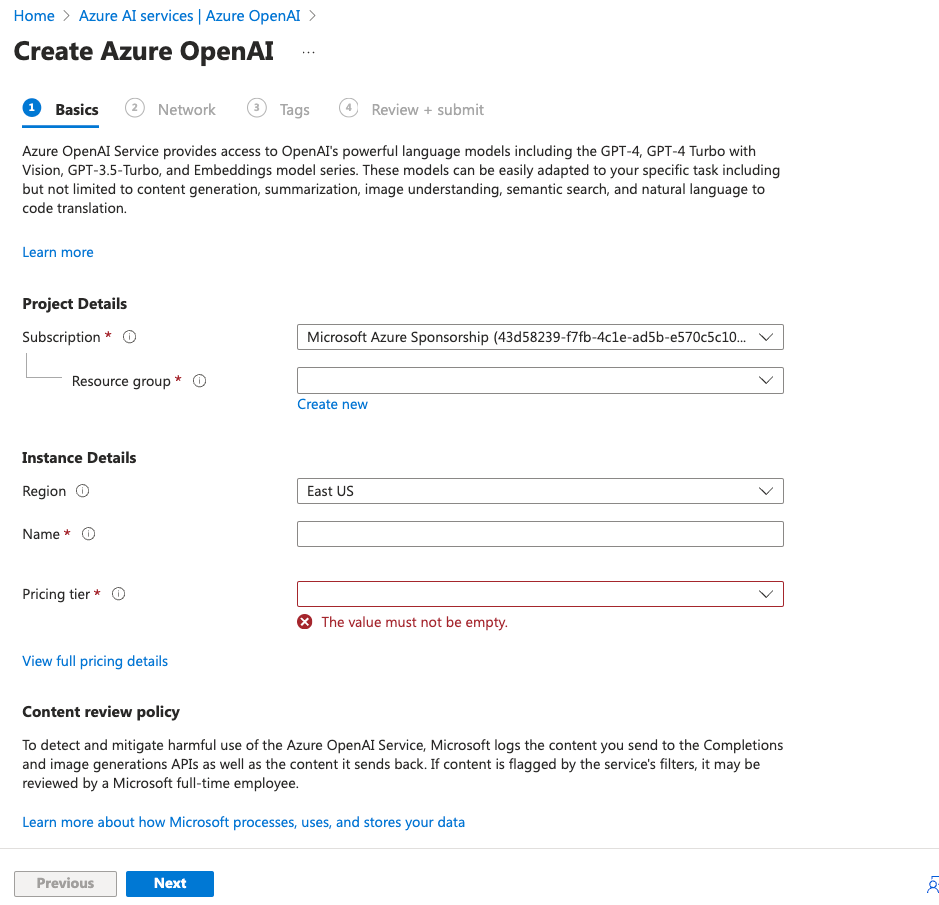
- On the next page, fill out the required fields:
- Subscription: Ensure your subscription is selected (choose the correct one if you have multiple).
- Resource Group: Select an existing resource group or create a new one to manage related resources collectively.
- Region: Choose the appropriate region based on model availability and the location of your users (closer regions reduce latency).
- Resource Name: Give your resource a unique name.
- Pricing Tier: Select the “Standard S0” tier (you can learn more about pricing here).
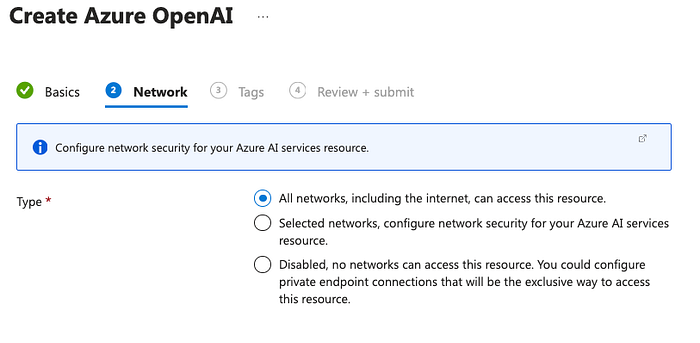
5 — Network Configuration:
Azure AI services offer a layered security model. Choose one of the following options based on your needs:
- All networks have access: Use this for public-facing applications that need global access, such as a chatbot on a website.
- Selected networks have access: Choose this for internal applications restricted to specific IP addresses or virtual networks, such as a business intelligence tool for company use.
- Disabled, no networks can access: Use this for highly sensitive data, ensuring access is limited to secure, private endpoints (e.g., financial applications processing confidential transactions).
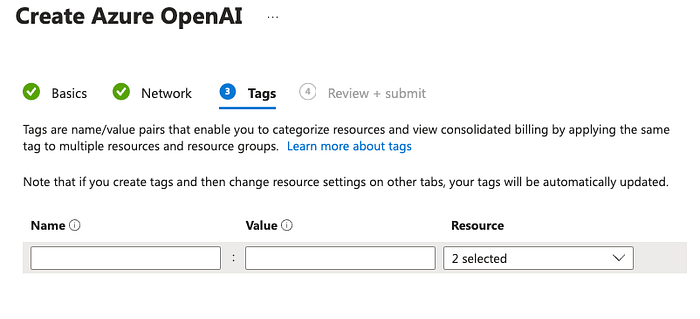
6 — Tags:
Adding tags to your Azure resources provides several benefits, including:
- Organization: Tags help categorize and identify resources across different projects.
- Cost Management: Tags enable better cost management by allowing you to generate reports based on tags.
- Automation: Tags can be used in automation scripts for applying policies or performing actions on specific resources.
- Compliance and Governance: Tags help enforce compliance and governance by identifying resources that meet certain criteria.
- Resource Management: Tags make it easier to manage and filter resources within the Azure portal.
7 — Review and Create:
After completing the form, review your inputs and click “Create.” Once the resource is created, you’ll be directed to the resource page. Click “Go to resource” to continue.

The following page will be displayed:

Now we are ready to deploy our model!
Deploying a model
1 — Open Azure OpenAI Studio:
Click on “Go to Azure OpenAI Studio” (or go directly to oai.azure.com).
2 — This will open another page https://oai.azure.com/ similar to the following:

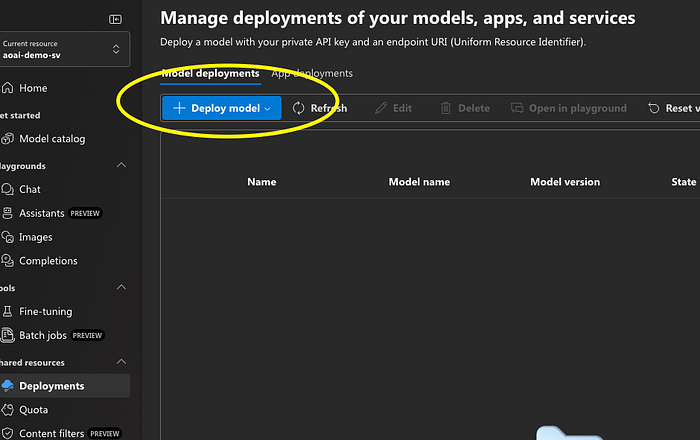
3 — Select “Deployments” from the left-hand menu.

4 — Deploy Your Model:
If this is your first deployment, the page will be empty. Click “Deploy model” and choose one of the following options:
- Deploy base model: Select from the available OpenAI models in your region.
- Deploy fine-tuned model: If you’ve fine-tuned a model, you’ll find it here (we’ll cover fine-tuning in another tutorial).
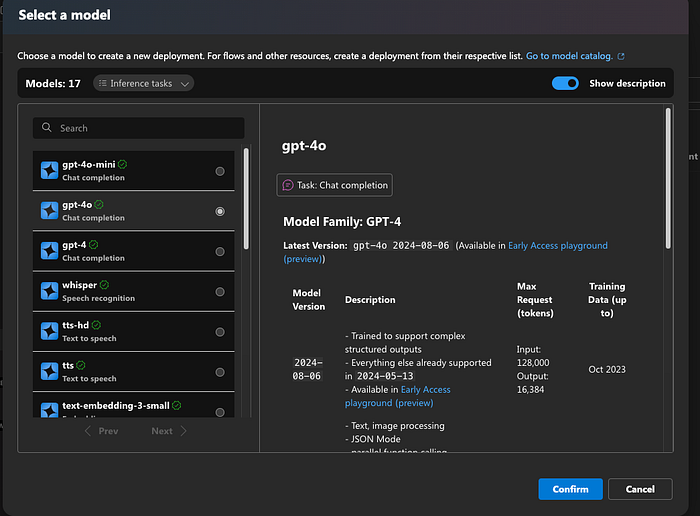
5 — A page will pop-up with all OpenAI models available in the region, if you select one you will see a description of the model in the right panel. Select the one you want to deploy and click “confirm”.
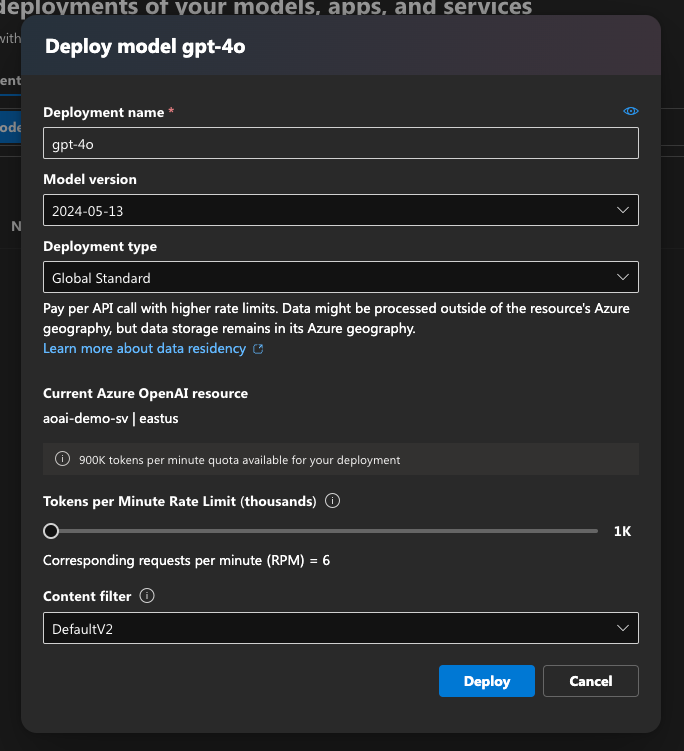
6 —Configure Deployment:
- Deployment Name: Use the model name by default, or create a custom name.
- Model Version: Choose the version of the model you want to deploy.
- Deployment Type: Choose the configuration (e.g., Global Standard for general use, Global Batch for batch processing, Standard for typical deployments, or Provisioned Managed for managed infrastructure).
- Tokens per Minute Rate Limit: Define the maximum number of tokens your model can process per minute.
- Content Filter: Set the content filter to control the type of content your model can generate or process.
After filling the fields, click “deploy”.
7 — Finalize and Deploy:
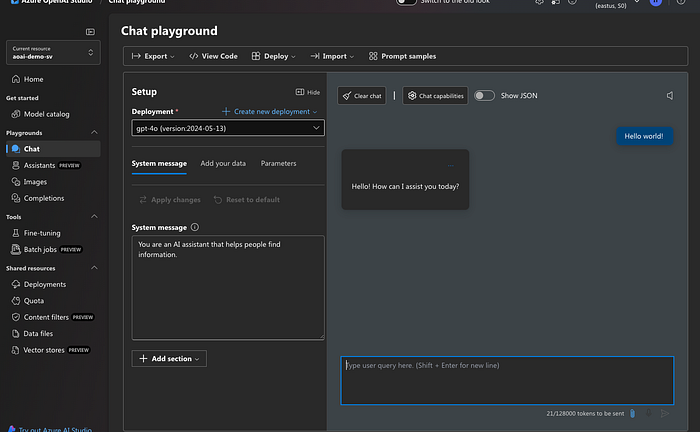
After completing the configuration, click “Deploy.” The model will appear on the “Deployments” page. To test the model, click “Open in Playground,” which will redirect you to the “Chat session” for testing.
Get your Endpoint and Key
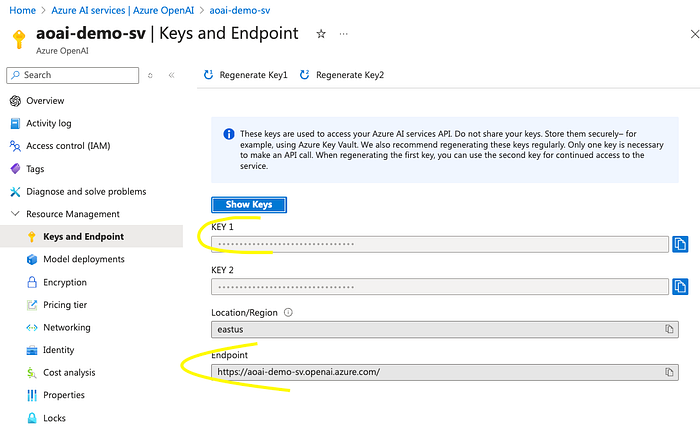
In the case you need to get the endpoint and key of your resource:
1 — Go to portal.azure.com and search “Azure OpenAI”.
2 — Select your resource from the list of resources displayed.
3 — Select “Keys and Endpoint” in the left menu and there you can find the data that you need.
Conclusion
Setting up and deploying models in Azure OpenAI combines the power of OpenAI’s cutting-edge language models with the security, scalability, and enterprise features of Microsoft’s Azure platform. By following these steps, you can effectively create, manage, and deploy your models, ensuring that your applications benefit from the robust capabilities of both OpenAI’s technology and Azure’s infrastructure. With built-in security, customizable network configurations, and flexible deployment options, Azure OpenAI empowers developers to build AI-driven solutions tailored to their unique needs.
